There are two options for adding streaming media in WebCampus: external links and embedded videos. Each vendor has slightly different directions for creating persistent, authenticated links and embed codes.
External links
Similar to linking to journals or ebooks, you can use a persistent, authenticated permalink to open the content in a new tab.
- Learn more about persistent, authenticated links.
- Find instructions for integrating different library resource types into WebCampus.
Embedded videos
You can also embed streaming media directly in your course by using an embed code. Embed codes should be added to WebCampus using the html editor.
For instructions on adding the resources to your courses, see adding links in WebCampus.
Vendor-specific instructions
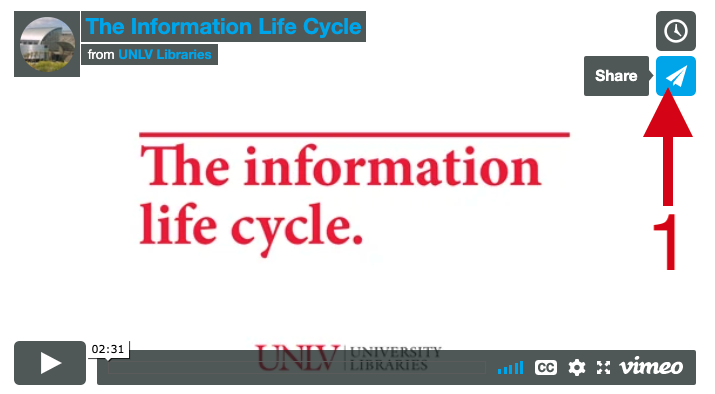
- Once you find the library video tutorials to which you would like to link, click on the "Share" paper plane icon in the top right of the video.
Option 1: External link
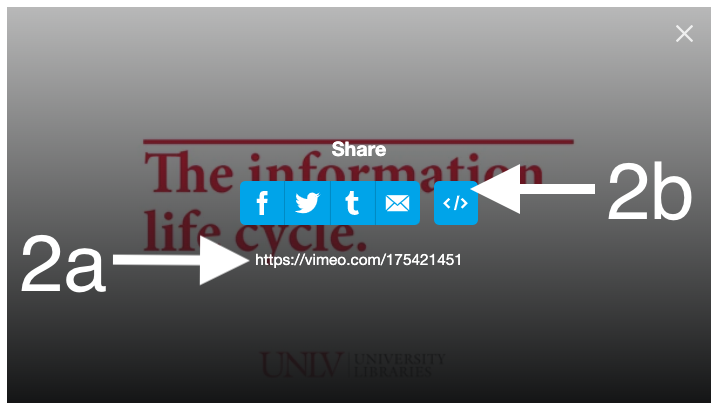
- a. Copy the URL underneath the share icons. It is ready to add to your course.
Option 2: Embedded video
- b. To generate an embed code, click on the “Get embed code” </> icon.
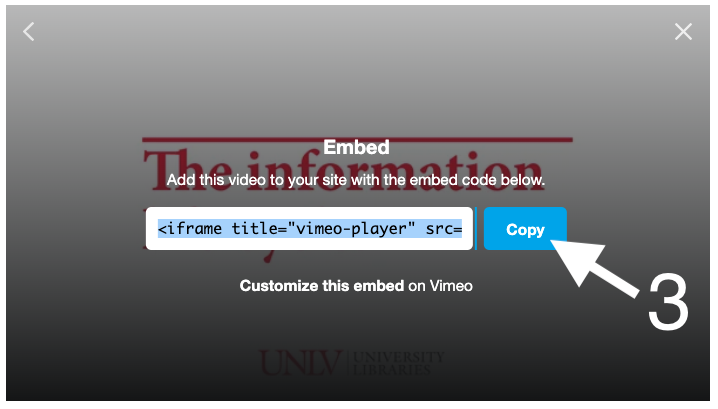
- Copy the embed code by clicking the copy button. It is ready to add to your course.
Films on Demand makes it easy to embed videos directly in WebCampus through the Rich Content Editor in your course. You can also generate links and embed codes from within the Films on Demand database. Instructions for both are provided below.
WebCampus rich content editor
This is the easiest and most reliable method to embed Films on Demand content in your course. You can add a video anywhere in WebCampus that uses the Rich Content Editor.
Video overview
- In your course, go to the page where you would like to add the video.
- Click the “Edit” edit button.

- Click on the “More External Tools” v icon.
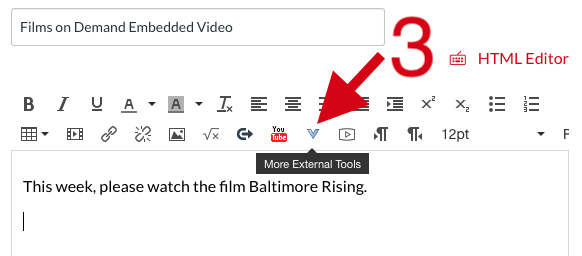
- Scroll down until you find Films on Demand and click it.
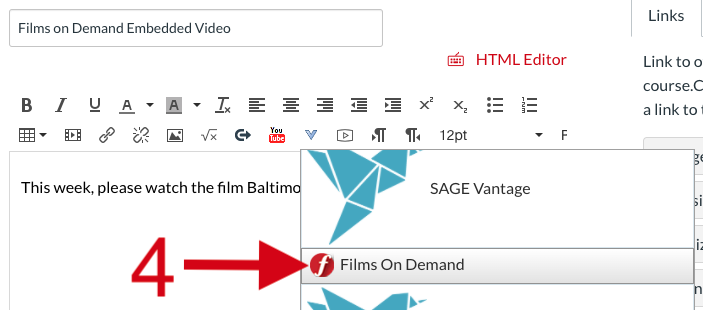
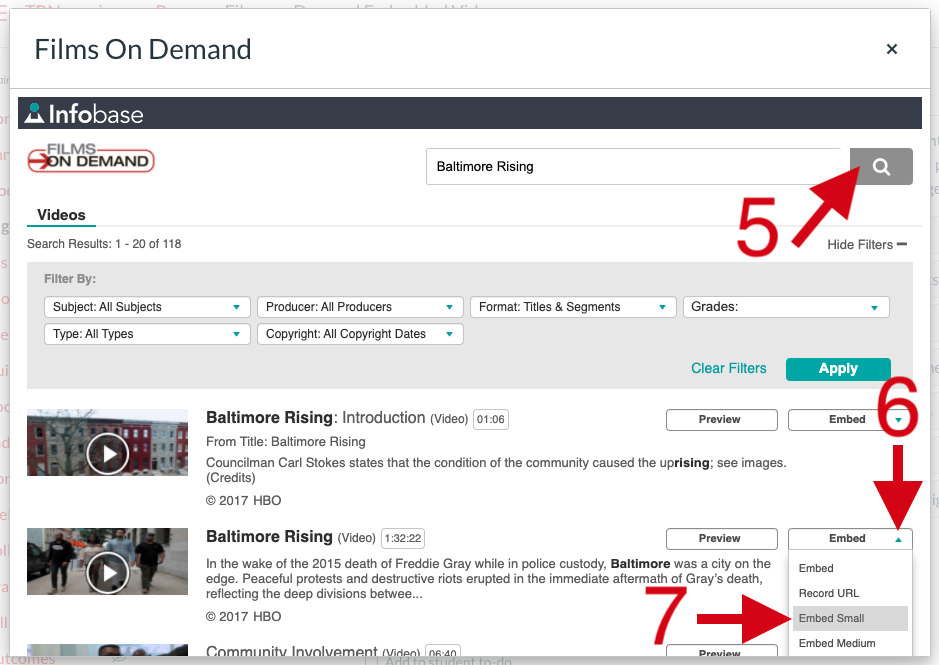
- In the pop-up window, search for the title you would like to add to your course or enter keywords to browse the collection.
- Click on the “Embed” dropdown menu.
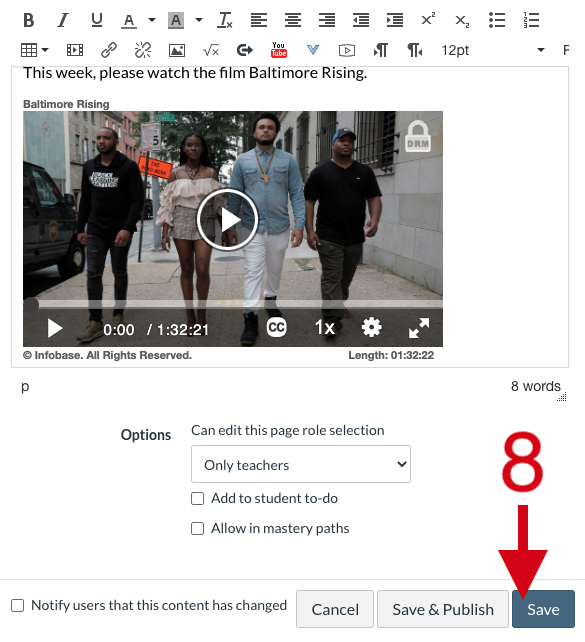
- Select the size of the video you would like to embed. This is add it to the page.
- Click save.
Films on Demand Database
This method is best for generating an external link to the video. Although an embed code is also available, it does not always generate a fully-functional embed code. We recommend using the WebCampus Rich Content Editor method above instead.
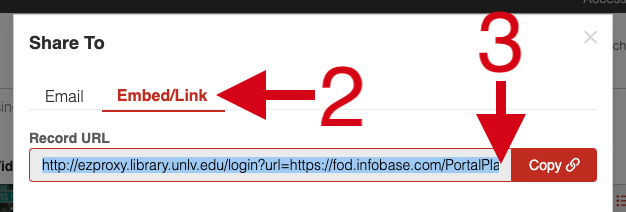
- Once you find the video to which you would like to link, click on the "Share To" sharing icon to the bottom left of the video.
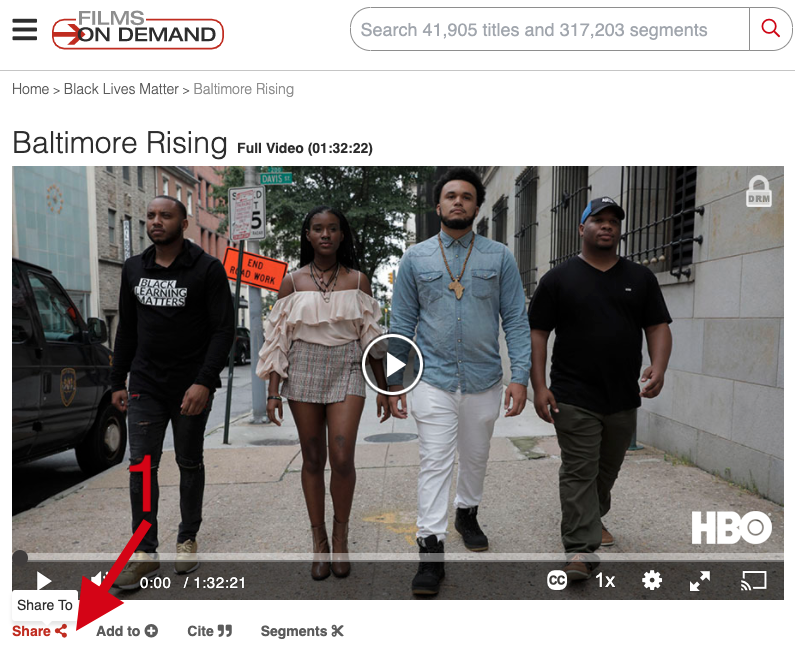
- Click on the “Embed/Link” Tab.
- Copy the “Record URL”.
This URL includes the ezproxy prefix for off-campus access and is ready to add to your course.
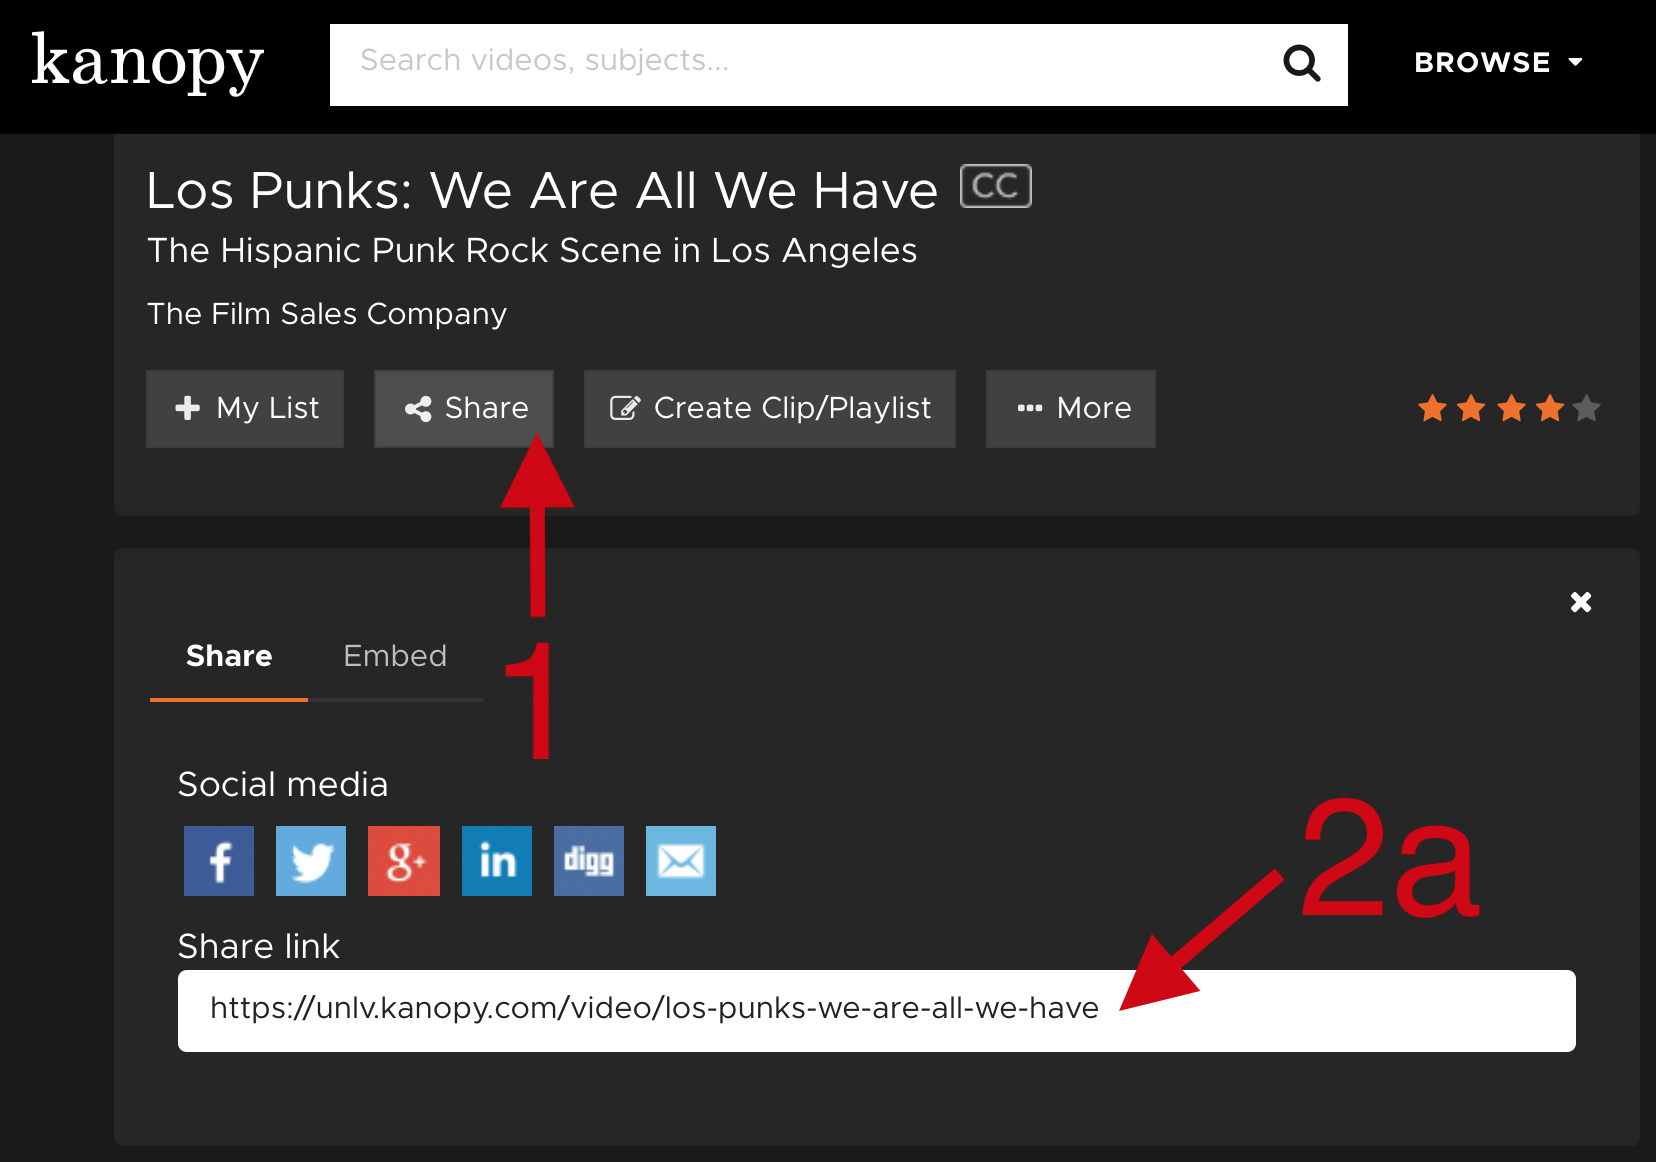
Once you find the video on Kanopy to which you would like to link, click on the "Share" button underneath the video.
- Once you find the video to which you would like to link, click on the "Share" button underneath the video.
Option 1: External link
- a. Copy the URL underneath “Share link”. It is ready to add to your course.
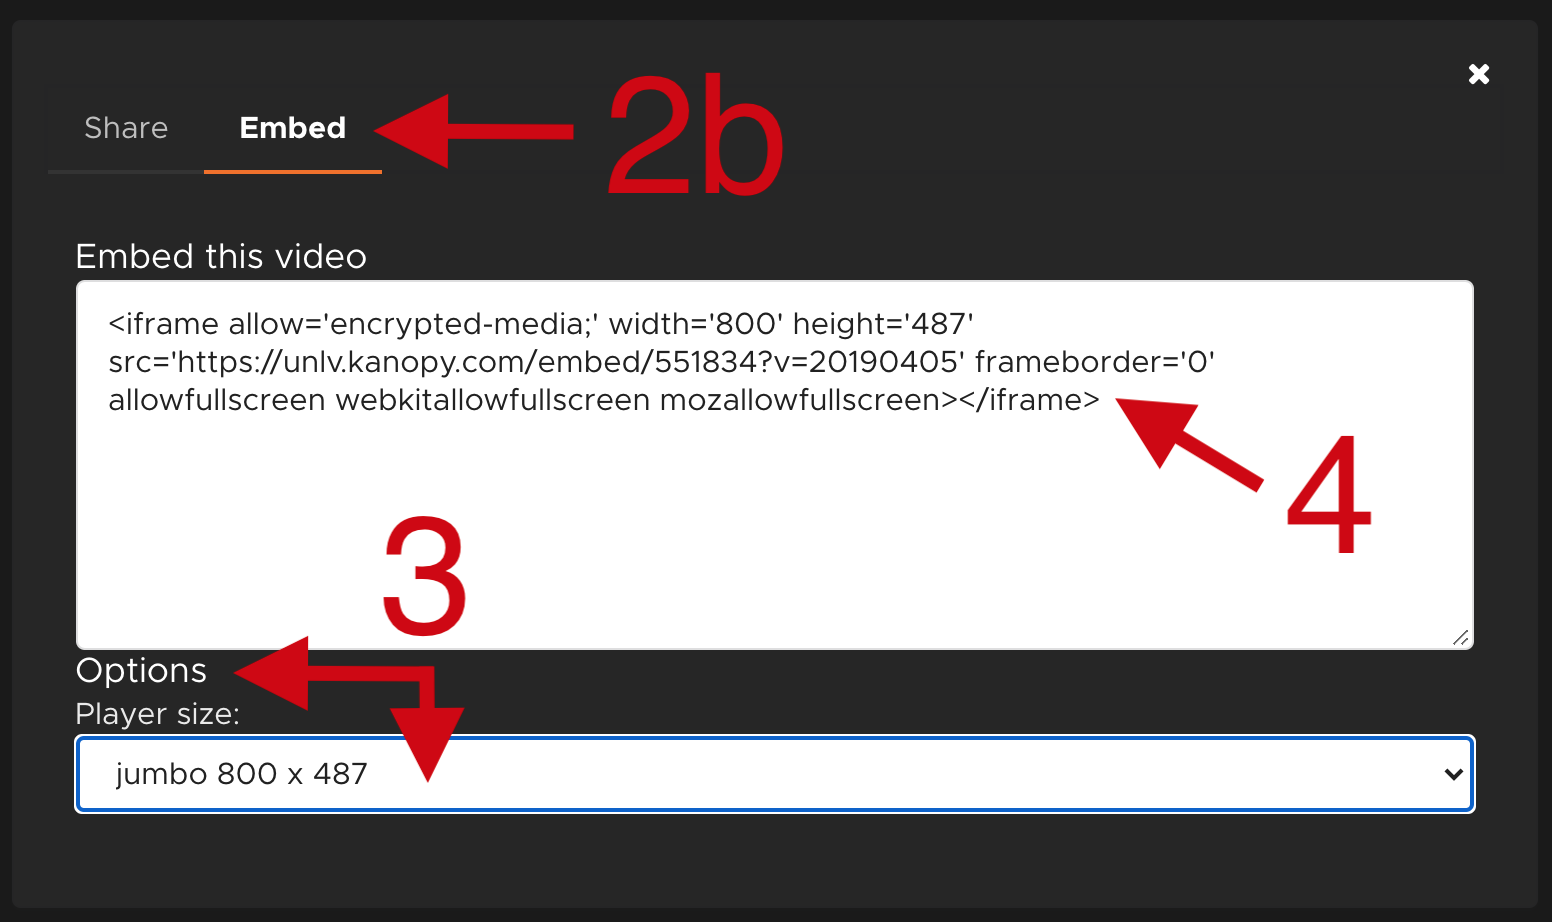
Option 2: Embedded video
- b. To generate an embed code, click on the “Embed” tab next to “Share”.
- Optional: You may edit the player size by selecting “Options” and then selecting a size from the dropdown menu.
- Copy the embed code in the text box. It is ready to add to your course.
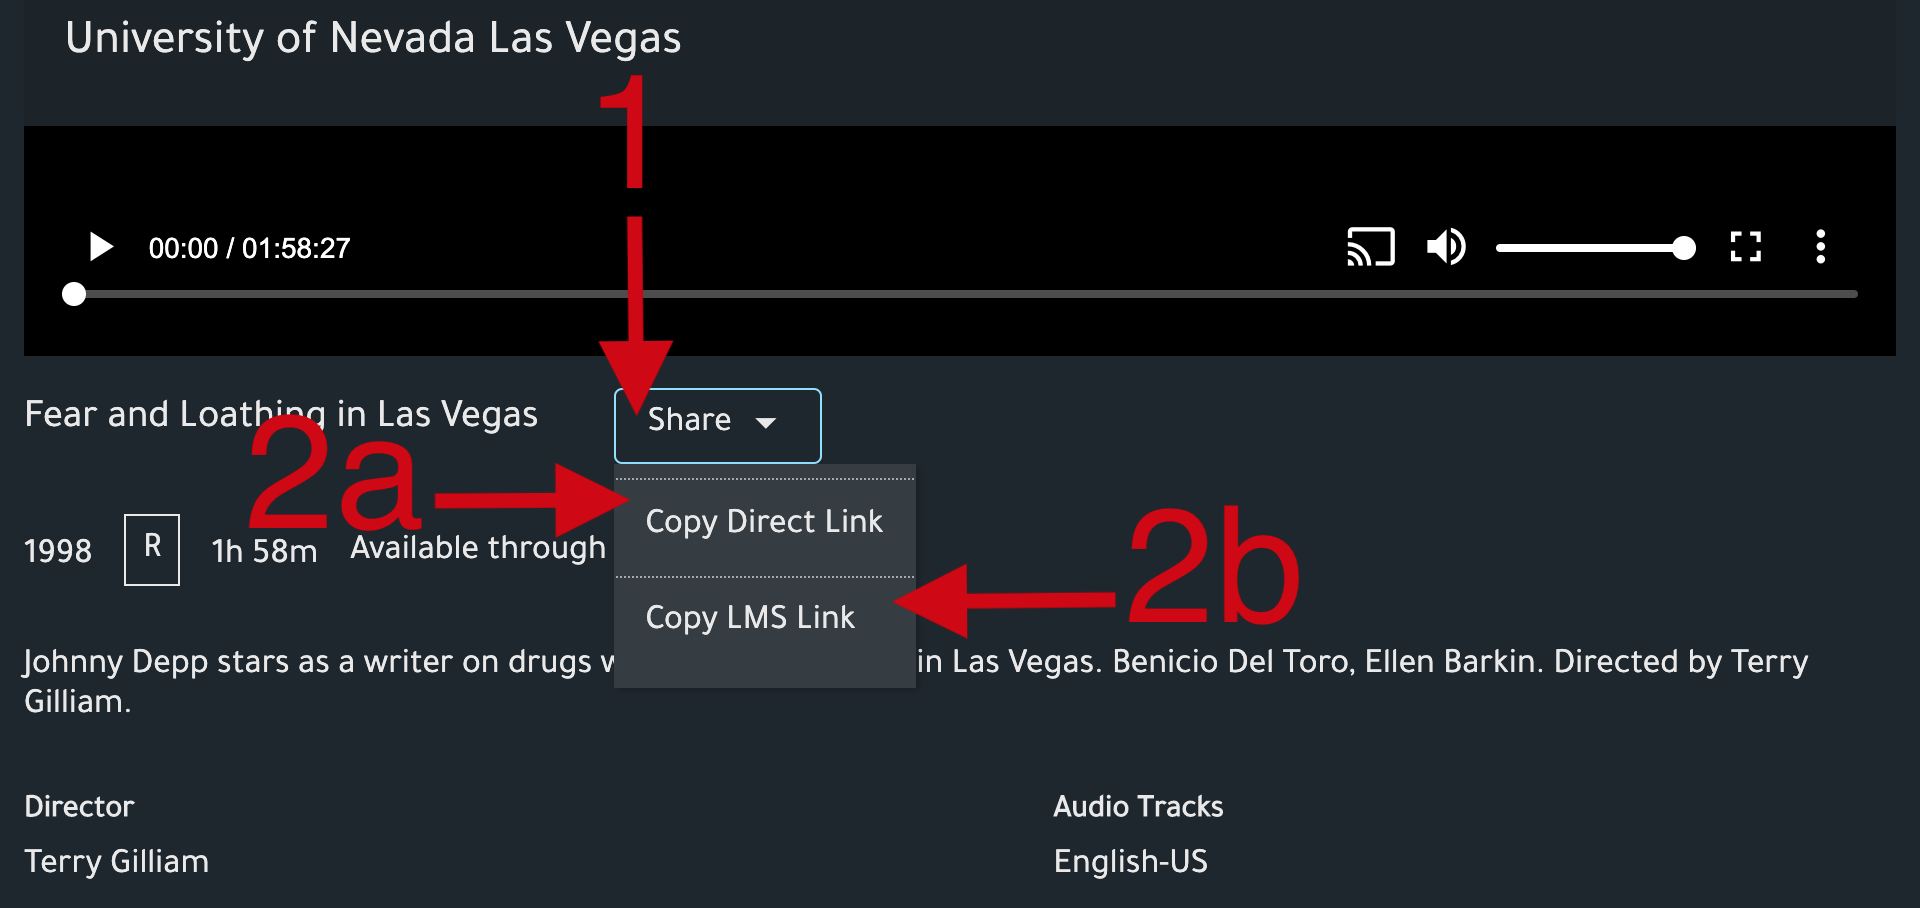
- Once you find the video on Swank Digital Campus to which you would like to link, click on the "Share" dropdown menu underneath the video.
Option 1: External link
- a. Select “Copy Direct Link”. This will automatically copy the URL to your clipboard.
- Add the ezproxy prefix (http://ezproxy.library.unlv.edu/login?url=) to authenticate the URL.
Example: http://ezproxy.library.unlv.edu/login?url=https://digitalcampus.swankmp.net/unlvdatabase/watch/145ABB9F91ADF41C?referrer=direct.
It is ready to add to your course.
Option 2: Embedded external link
- b. Select “Copy LMS Link”. This will automatically copy the embed code to your clipboard. It is ready to add to your course.
Note that this will only embed an external link to the content. Swank does not support embedded video in WebCampus at this time.
- Once you find the Alexander Street Press video to which you would like to link, click on the "Share" tab above the video.
Option 1: External link
- a. Click the “Copy Permalink” button.
- Click the “Copy” button to copy the permalink. It is ready to add to your course.
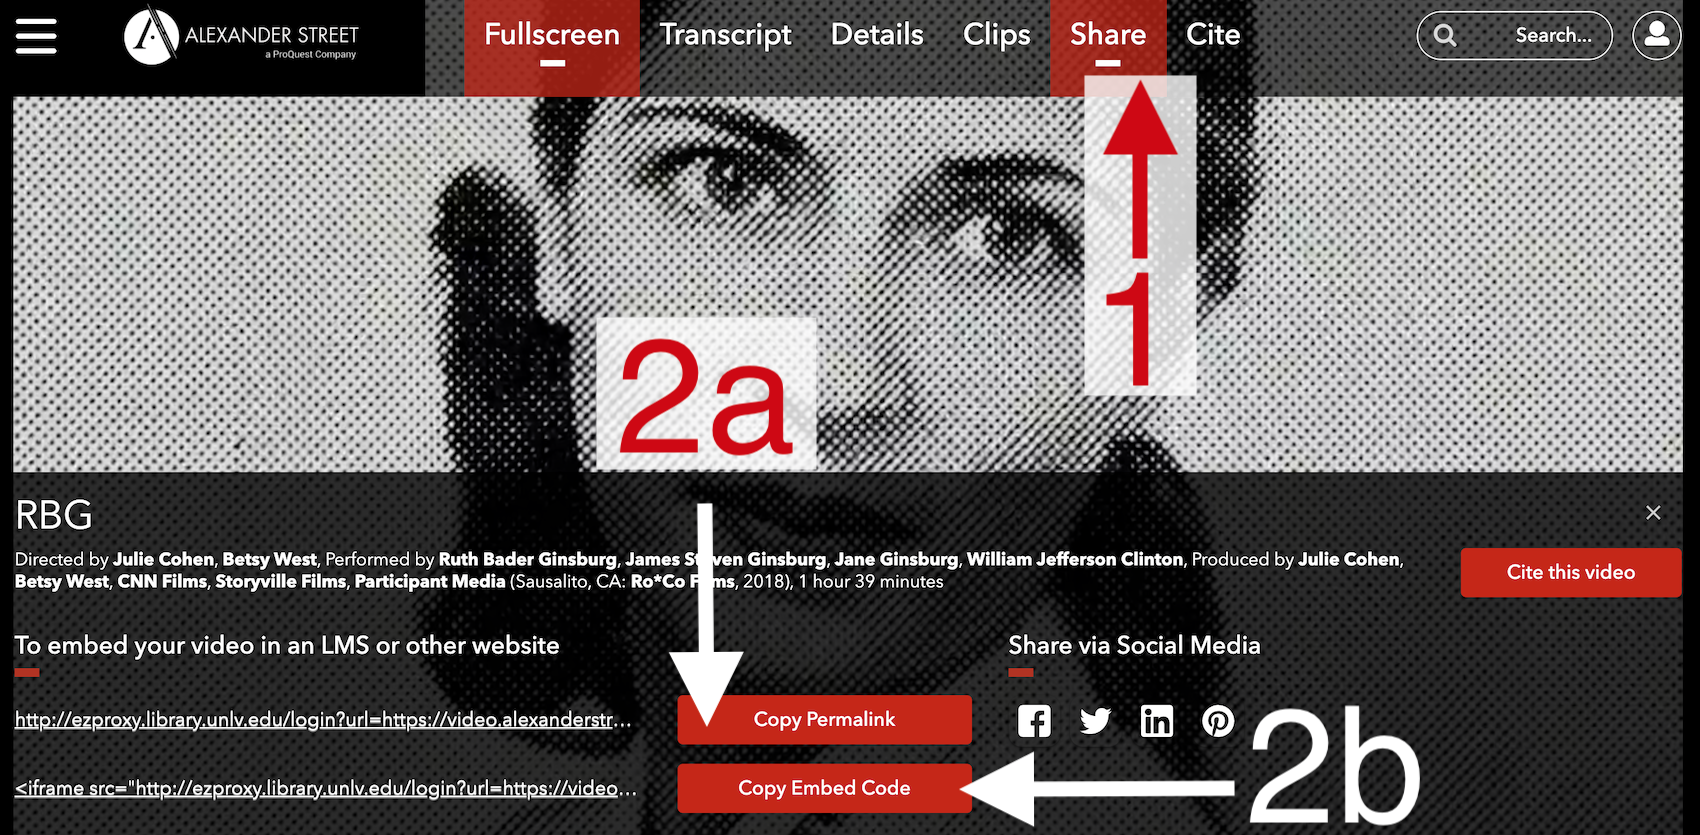

Option 2: Embedded video
- b. To copy the embed code, click on the “Copy Embed Code” button.
- You will need to add some information to the embed code in order for it to properly display in WebCampus. This includes adding an s for secure and www. to the ezproxy URL.
Example:
<iframe src="https://www.ezproxy.library.unlv.edu/login?url=https://video.alexanderstreet.com/embed/rbg" width="640" height="390" frameborder="0" allow="encrypted-media" allowfullscreen></iframe> It is ready to add to your course.
To view all streaming media databases, go to our A-Z list of databases page and limit the database type from “All Database Types” to “Videos, DVDs, and other media”.
For additional support, please contact Kevin Sebastian at kevin.sebastian@unlv.edu.

